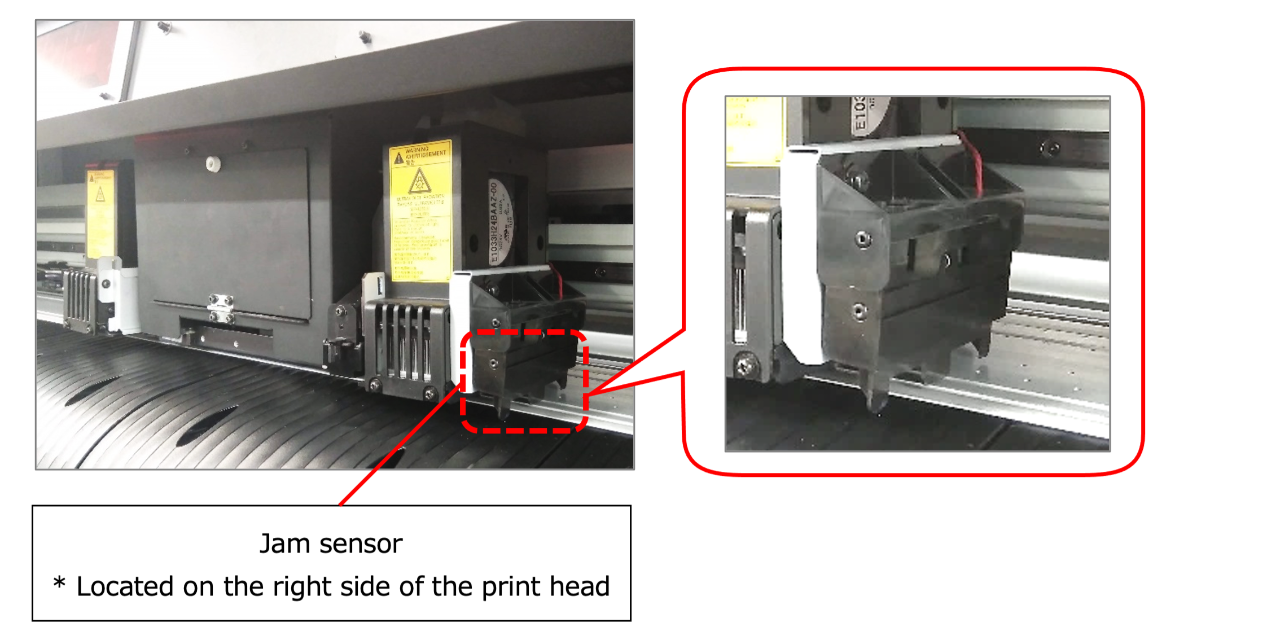
- The print head is equipped with a jam sensor for head protection. If the head comes into contact with the media, the jam sensor reacts, triggers jam error, and printing stops. Printing cannot resume until the issue is resolved. Remove any interference between the head and media to clear the media jam. Afterword, perform a test print to ensure there is no nozzle clogging before proceeding with printing.

If media jams occur frequently, please check the following.
1. If the media is not properly set, it may cause media lifting and interfere with the jam sensor.
- Insert the roll holder into the paper tube until it reaches the back.
- Align both end faces of the roll media.
- Use the media holder to sandwich both ends of the media.
- Use the take-up unit to wind up the media.
Check that the media is set up correctly.
Please refer to the video "UCJV300/150_Setting a roll media" for the media setup procedure.
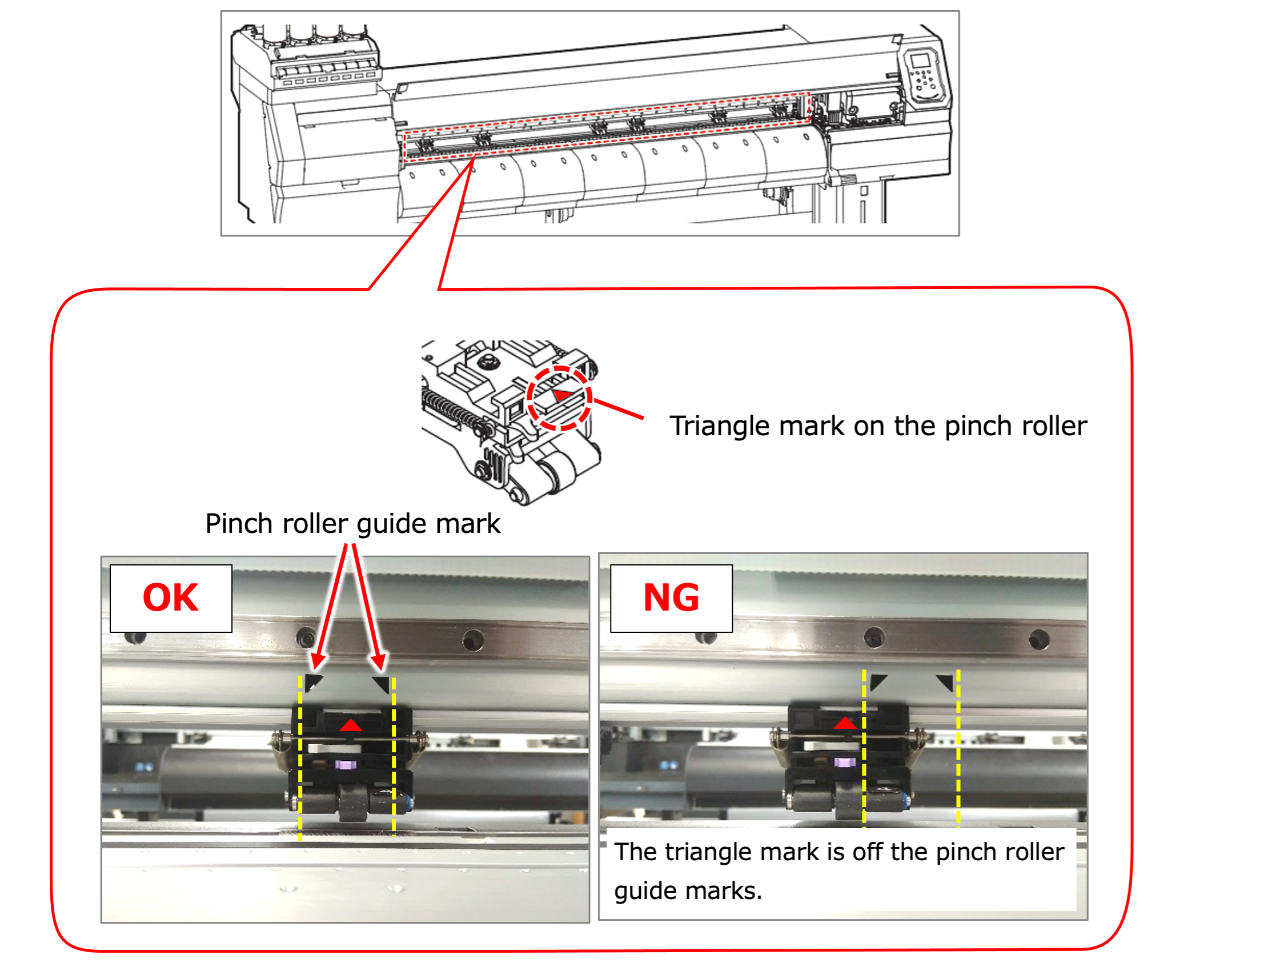
2. If the pinch roller is not set correctly, it can cause issues such as media lifting or wrinkles.
(1) Place the pinch rollers evenly, aligning the triangle mark on the pinch roller with the
pinch roller guide mark.
For detailed instructions, please refer to the video "UCJV300/150_Setting a roll media".

(2) If the number of pinch rollers in use is low, also use the media roller to secure the media.
If applying pressure to the middle causes roller marks when using the middle roller, set the holding pressure to MID (medium) or LOW (low).
"For instructions on how to set up the pinch roller, please refer to the "UCJV300/150 Operation Manual" > "2.5 Setting the Pressure and Number of Pinch Rollers to Use."
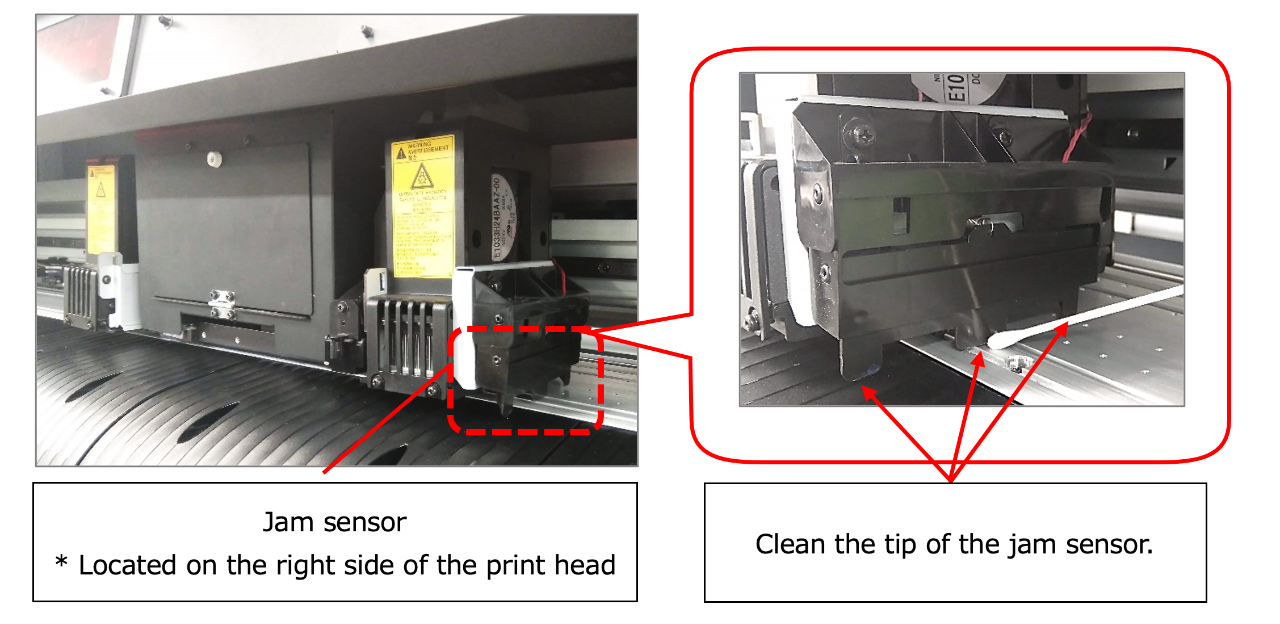
3. If dirt adheres to the jam sensor itself, it may interfere with media and others.
Please clean it to remove any dirt.

4. If dirt adheres to the media holder, it may interfere with the jam sensor.
Please clean it to remove any dirt.

5. If the area around the head is dirty, the dirt may also adhere to the media holder.
Therefore, please clean the area around the head wiper and cap.
Please refer to the user manual or instructional video for cleaning procedures.
- User manuals:
UCJV300/150 Operation Manual
UCJV300/150 Requests for Care and Maintenance
UCJV300/150 Daily Care
- Video:
Cleaning the Head and the Area around
Cleaning the Capping station
Cleaning the Wiper
Replacing the wiper
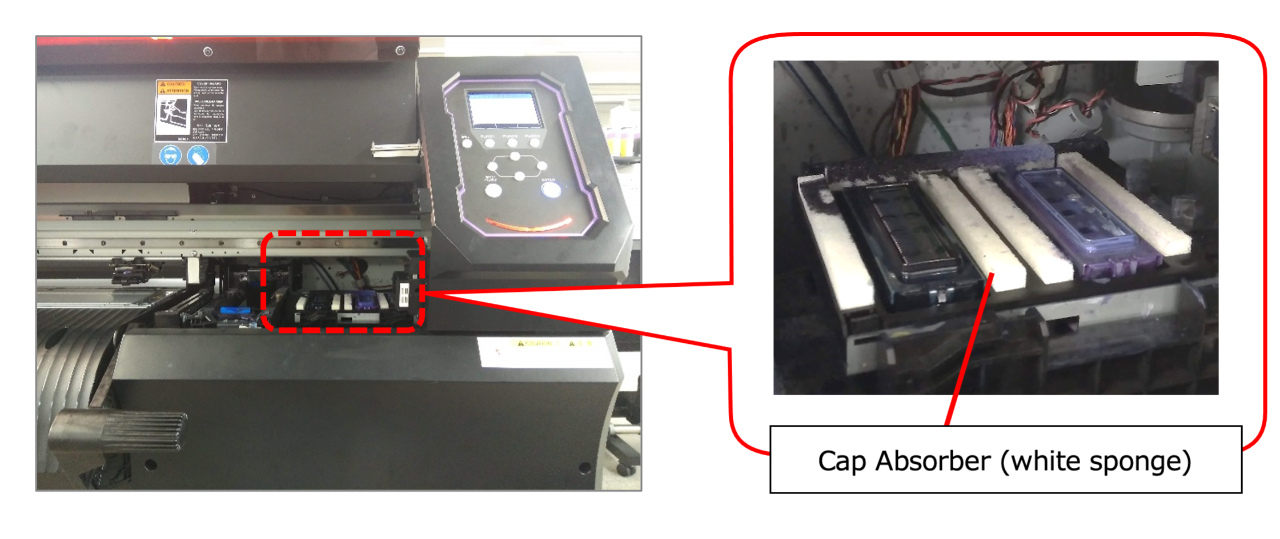
6. If the cap absorber in the station is floating, it may interfere with the am sensor.
In such cases, please wear maintenance gloves and push it in by hand.

* If the cap absorber is dirty, replace it with a new cap absorber.
- Cap Absorber: UCJV CAP ABSORBER SET (SPA-0296)
- Replacing procedure: UCJV300/150 Procedure manual for the replacement of the Cap absorbent set
7. If the media is thick or if waves or warping occur, causing contact with the head, please raise the head height.
For changing the head height, refer to the FAQ: How do I change the head height?
Note that raising the head height may result in left-right deviations in the print output, especially in bidirectional printing.
In such cases, perform "Dot Position Correction" before printing.
"For instructions on Dot Position Correction, please refer to the
"UCJV300/150 Operation Manual" > "2.9 Correcting the Drop Position".
8. Additionally, please check for any objects that may interfere with the print head (jam sensor).
